Adding new Promotions & deals
- Press the Add button.
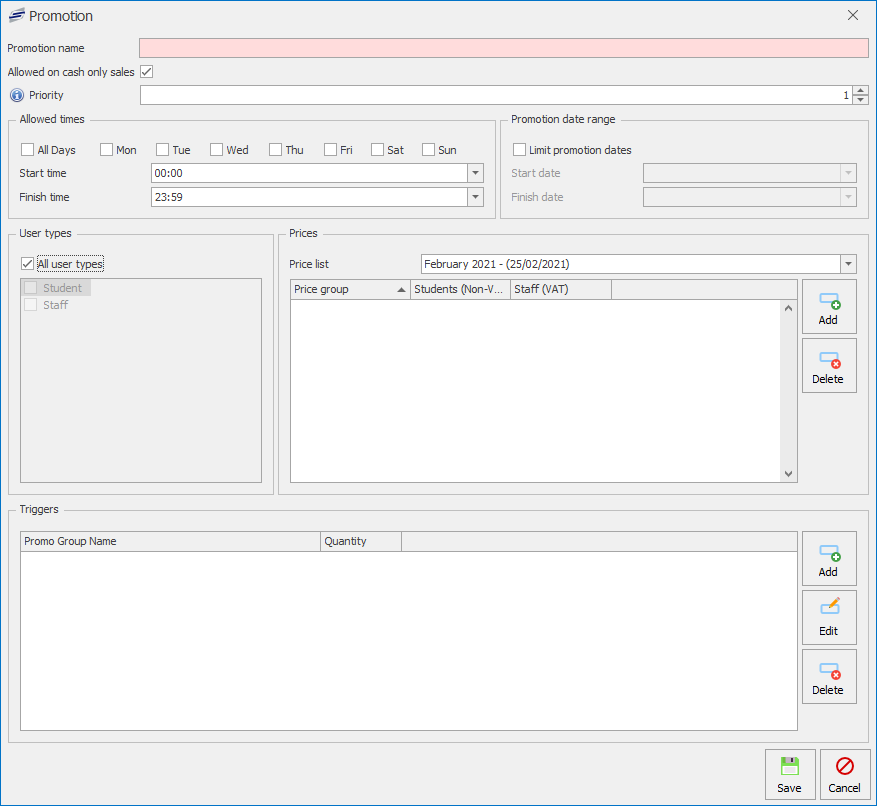
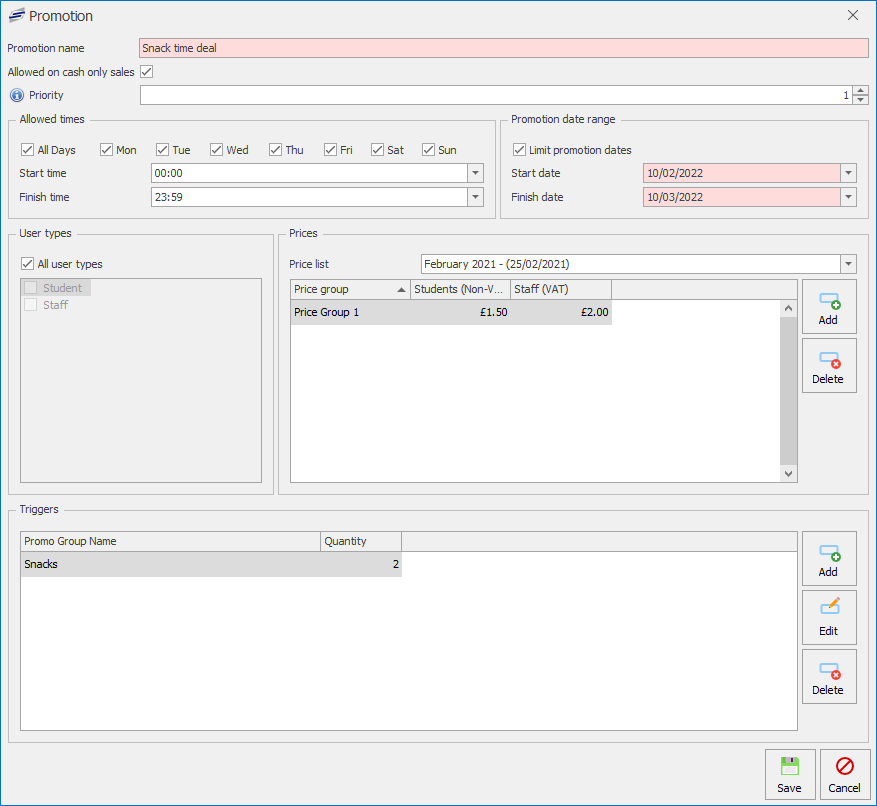
- This will display the Promotion config.
- Enter a Promotion name and select if it is Allowed on cash only sales by ticking or unticking the box.
- In the Allowed times section select which days the Promotion is available and what Start & End time period it is available in the day.
- To set a date range for the promotion to be available tick the box to Limit promotion dates and select a Start & End date.
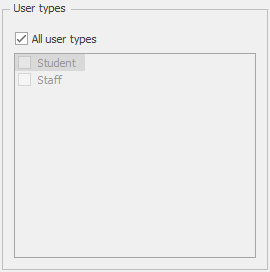
- Select the User types you want the promotion to apply to.
- Complete the Prices and Triggers sections. These are explained in more detail below.
Prices
In the Prices section you can select which price lists, and within those price groups, the promotion will be applied to, and set the price users will pay for the promotion.
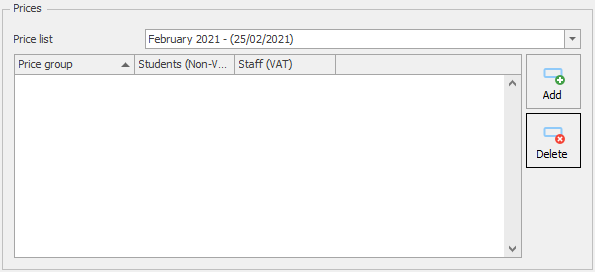
Adding Price groups
- Select a Price list from the drop-down menu.
- Press the Add button.
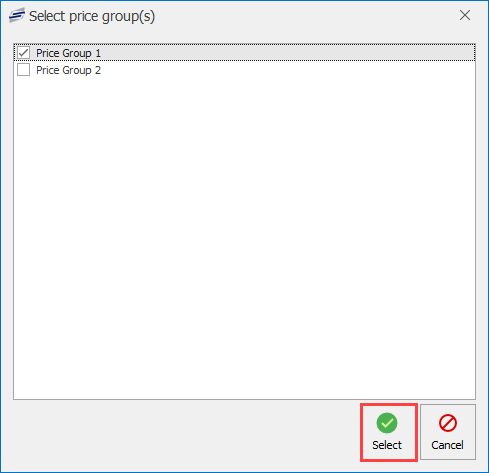
- Select the price group(s) you wish to add using the check boxes and press Select.
- Enter the promotion prices for the applicable user types by simply pressing on the column and typing the value.
- Repeat this process for any further price lists and price groups you want the promotion to apply to.
Deleting Price groups
- Select a Price list from the drop-down menu.
- Select a Price group and press the Delete button.
- This will remove the price group for that price list.
Triggers
Triggers are groups of PLUs that will set off a chain of events when other Triggered promo groups of PLUs are selected within the same transaction. The system knows if the same groups are part of a promotion and will then deduct the amount from the final sale.

Add Triggers
- Press the Add button.
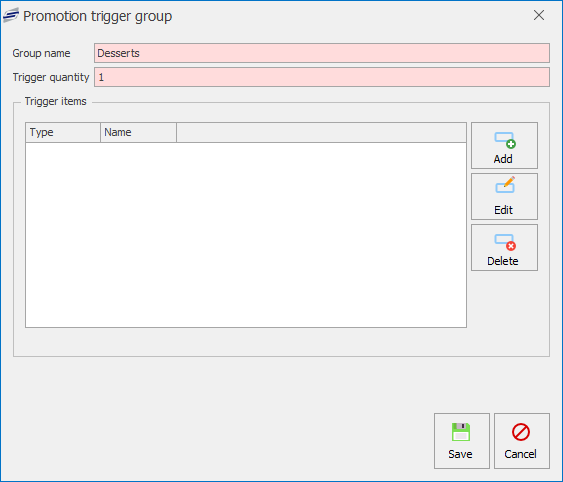
- Enter a Group name for the promo group and enter the Trigger quantity amount, this is the amount of selections for the PLU to active the trigger.
Trigger Items
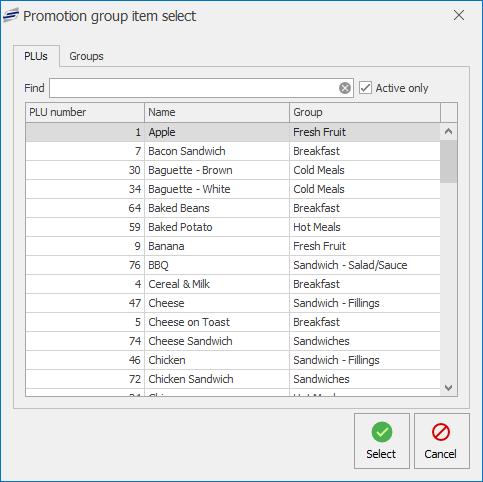
- Press the Add button.
- Find and select either a PLU or Product Group.
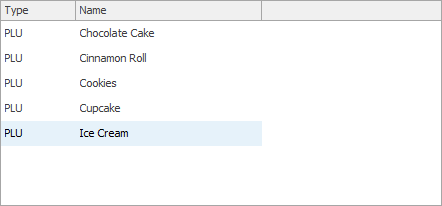
- You can continue to add more PLU’s or groups.
- Press Save.
Edit Triggers
- Select a Trigger from the list and press the Edit button.
- You can Add, Edit or Delete any PLUs in the Trigger items section. If needed you can also amend the Group name or Trigger quantity.
- Press Save.
Delete Triggers
- Select a Trigger from the list and press the Delete button.
- This will remove the Promo group from the Triggers section.
- Press Save.
Editing Promotions & deals
- Select a Promotion from the list and press the Edit button.
- Amend promotion config accordingly.
Delete Promotions & deals
- Select a Promotion from the list and press the Delete button.
- Press Yes or No to confirm deletion.
- This will delete the promotion from the list.
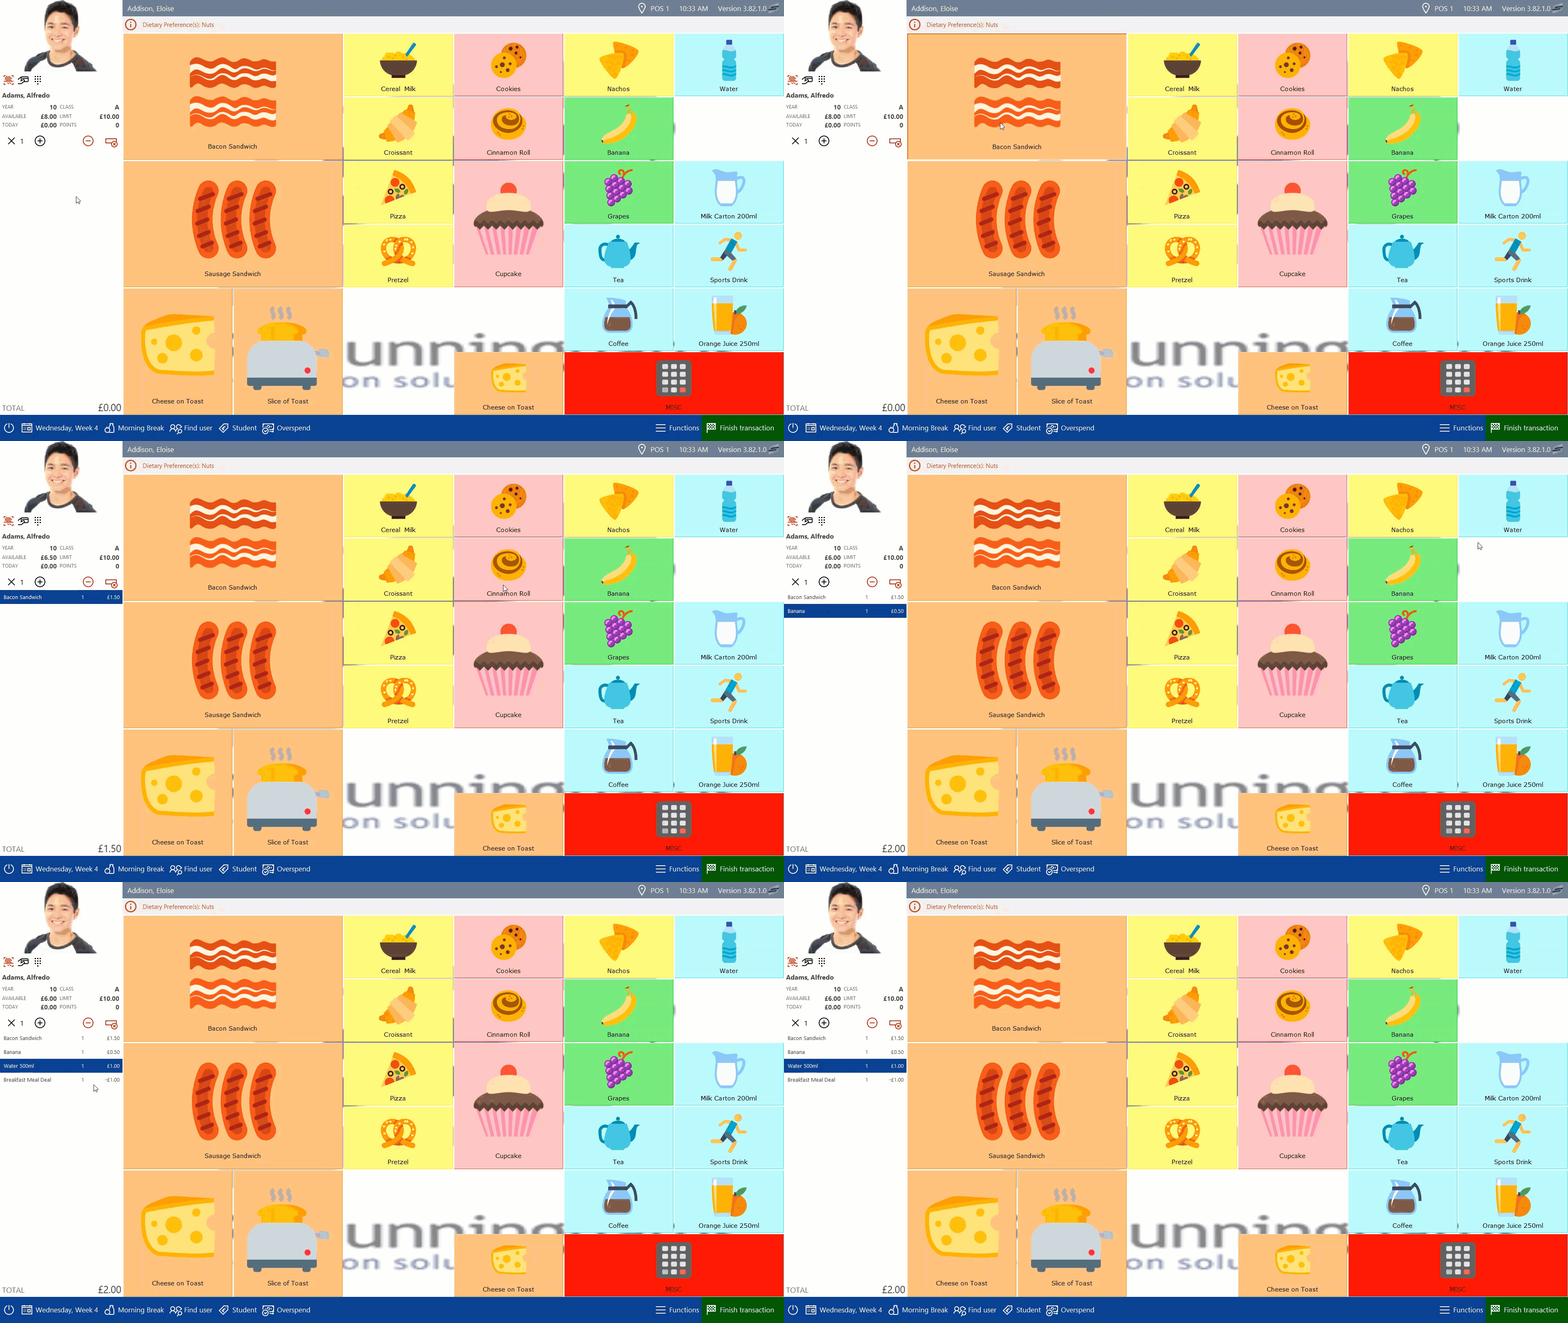
The meal deal will active as soon as the trigger completes. Below is an example showing how it works.
Last modified:
19 July 2022








Post your comment on this topic.