To generate and view a report;
- Select the report that you require from the list.
- Double-click on it or press the View button.
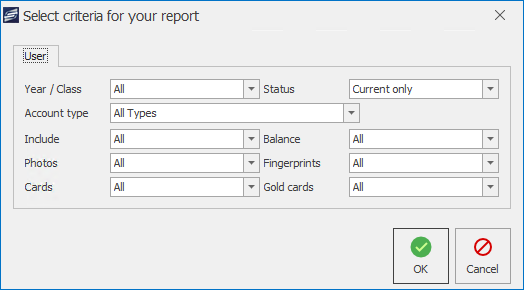
- Select the required criteria for the report and press OK.
- The report will be displayed.
Navigating the report
Some reports may be multiple pages long. These reports can be easily navigated using the ‘First’, ‘Previous’, ‘Next’ and ‘Last’ buttons.

Changing the report criteria
If you wish to regenerate the report using a new set of criteria, press the Criteria button.
Update the criteria as required and press OK to regenerate the report.
Printing the report
To print the generated report, simply press the Print button and follow your printers prompts.

Exporting the report
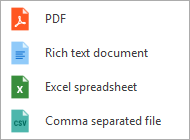
Generated reports can be exported into .PDF, .RTF (rich text), .XLSX (excel) or .CSV (comma separated) files. To do this;
- Press the Export button.
- Choose the file type that you wish to export the report as.
- Select a location and enter a filename for the exported report.
- Press Save. The report will be saved to the chosen location.
- Press Yes to open the file now or press No to return to the report in Fusion.
Pinning a report
If the generated report is a report that you will commonly want, you can save yourself time in the future by ‘pinning’ this report to your user dashboard. To do this;
- Press the Pin button.
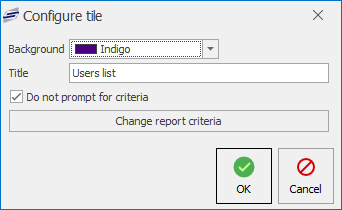
- Configure the pinned tile as required:
- Choose a background colour for the tile.
- Set a title that will appear on the title.
- If you wish for the report to automatically generate using the existing criteria, leave the ‘Do not prompt for criteria’ check box selected. Unselecting this will prompt you to select the criteria when pressing the tile from your user dashboard.
- Press OK to pin the tile.
- If you now view your user dashboard, the tile will be listed as configured.
Last modified:
29 October 2024


Post your comment on this topic.